(!) Since support from Microsoft will end on January 14 2020, Windows 7 user might not be able to use MISUMI website effectively. Please consider to update your system as ‘MISUMI Website system requirement’.

ideanote
inCAD Library

Please read before use

What is inCAD Library?

  • Helpful application examples for mechanical engineers.

The Concept of inCAD Library

  • Online application library with a range of ideas for all manufacturing industries.
  • Save design time and learn new design applications when you are concepting new machines.

Disclaimer

  • MISUMI may not offer all parts in each application design. Available parts can only be purchased separately not as a unit shown in each application design.
  • MISUMI does not guarantee quality, accuracy, functionality, safety or reliability for the combination of the parts in each application example. Accept these points prior to use.
  • 2014 Copyright MISUMI
  • The data cannot be used for any purposes (including sales promotion) except for designing your machine.
  • All associated CAD is free. Misumi reserves the right at its sole discretion to cancel, terminate or modify this offer.
  • MISUMI may change, add or delete application examples posted without prior notice.
  • MISUMI assumes no responsibilities for any damage incurred resulting from your use of the Service or any change, addition or deletion by MISUMI of the application examples for any reason whatsoever.

inCAD Library Features

  1. Get great new design ideas for these application examples.
  2. Over 300 design application ideas
    collected from dozens of industries!

  3. Find application examples quickly! Search by function, workpiece shape, etc.

  4. Download the CAD models for each application example.
  5. Log in to download free CAD models.
    Download CAD for the entire application example!

Good IDEA! button

Click the Good IDEA! Button when you like an application example!

*Can only be clicked once per application example.

  • Upper right corner on the page of application example details

  • Pop-up dialog for CAD data downloading

Page top

Keyword Search
No. Search

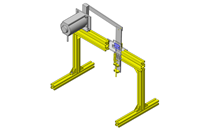
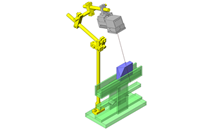
No.000112 Synchronized Rotation Mechanism

Synchronizes the index table and work piece holding tables rotation for inspection.

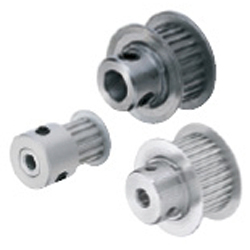
Pulley

Product name Timing Pulleys MXL Type
Part number ATP44MXL019-B-P10
Features New! METRIC/ INCH Bores Available!
* Orange colored cells in the table below indicate the part numbers used in this example.

Selection criteria

Efficient angular transmission without slipping or speed changes

Back to page top

Available sizes

■Timing Pulleys MXL Type

Material  Surface Treatment Applicable Belt Width
Pulley Flanged 4.8 6.4 9.5 12.7
2017 Aluminum Alloy 5052 Aluminum Alloy Clear Anodize
Black Anodize
Hard Clear Anodize
Electroless
Nickel Plating
1045 Carbon Steel Low Carbon Steel
Black Oxide
Electroless
Nickel Plating
304 Stainless Steel 304 Stainless Steel -

■Shapes and Sizes

Shape Number of Teeth Pitch circle Dia. Shaft Bore Dia.
With Collar 14-72 φ9.6-46.57 φ3-35
No hub
With Hub

* Available sizes to produce vary depending on materials and shapes
Please see the product pages for details.

Back to page top

Selection Steps

■Timing pulley selection steps

* Select the timing pulley together with the timing belt

The automated selection tool is available

http://fawos.misumi.jp/FA_WEB/pulley_us/

Determine conditions of use.
Designed power, rotational speed, rotation ratio, interim shaft distance, motion pattern, etc.)

Pulley (Belt) temporary selection
Tooth profile・Belt width

Verify Specifications
  • Confirmation of calculated shaft distance, etc.
  • Confirmation of belt tension and load

Back to page top

Accuracy Info

■Timing pulley accuracy

Shaft Bore Tolerance:H7

Back to page top

Technical Calculations

■Technical Calculations

https://th.misumi-ec.com/en/pdf/tech/mech/US2010_fa_p3513_3534.pdf

Back to page top

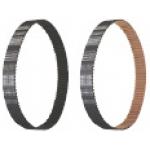
Timing Belt

Product name Timing Belts - MXL / XL / L / H
Part number TBN134MXL019
Features General purpose timing belts for transmission. Although some tooth fabrics for MXL and XL rubber belts are changed to comply with the bear-back specifications, it does not affect the performance.
* Orange colored cells in the table below indicate the part numbers used in this example.

Selection criteria

Efficient angular transmission without slipping or speed changes

Back to page top

Available sizes

■Timing Belts - MXL / XL / L / H

Material
Tooth Cover Tooth Rubber Core Wire
Nylon Cloth Chloroprene Rubber Glass fiber cord
S/Z Alternately Twisted Continuous
Polyurethane Polyurethane Kevlar

■Reference Dimensions

Pitch Belt Width Belt length reference
2.032 4.8、6.4、9.5、12.7 100-1100

Back to page top

Selection Steps

■Timing belt selection procedure

* Select the timing belt together with the timing pulley

The automated selection tool is available

http://fawos.misumi.jp/FA_WEB/pulley_us/

Determine conditions of use.
Designed power, rotational speed, rotation ratio, interim shaft distance, motion pattern, etc.)

Belt temporary selection
Belt type・Belt width

Verify Specifications
  • Confirmation of calculated shaft distance, etc.
  • Confirmation of belt tension and load

Back to page top

Performance info.

■Timing belt load info.

Back to page top

Technical Calculations

https://th.misumi-ec.com/en/pdf/tech/mech/US2010_fa_p3513_3534.pdf

Back to page top

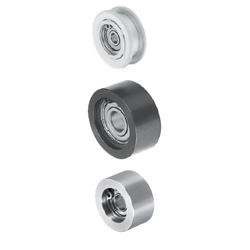
Idler

Product name Idler Pulleys - Backside Tension Type
Part number AFBD9-20
Features Can be used as the tension adjuster for timing belts.
* Orange colored cells in the table below indicate the part numbers used in this example.

Selection criteria

Necessary for maintaining the contact angle and belt tension

Back to page top

Available sizes

■Idler Pulleys - Backside Tension Type

Material Surface Treatment Bearing Material
2017 Aluminum Alloy Clear Anodize Steel
1045 Carbon Steel Black Oxide
Electroless Nickel Plating
304 Stainless Steel - Stainless Steel

■Sizes

Width O.D. Shaft Dia. Material
2017 Aluminum Alloy 1045 Carbon Steel 1045 Carbon Steel 304 Stainless Steel
(Black Oxide) (Electroless Nickel Plating)
9 φ20 φ5 - - -
φ25 φ6
10 φ25 φ6 - - -
11 φ25 φ6
11.5 φ25 φ6
14 φ30 φ8 - - -
15 φ30 φ8
16 φ40 φ10
19 φ30 φ8 - - -
φ35
φ45 φ10
22 φ35 - - -
φ45
26 φ40 - - -
φ45 - - -
φ50

* See the product pages for dimensions details.

Back to page top

IDEA NOTE Rotation of index table and rotation of work holder are synchronized.

As the index table rotation angle is 90 degrees and the rotation angle of the work holder is 90 degrees, the number of teeth on the fixed gear and that on the moving gear are the same. Gears with a module of 0.5 and 80 teeth are selected.

IDEA NOTE Ensure work holders rotate without backlash.

Use non-backlash gears.

  • TERMS AND CONDITIONS FOR USE OF CAD DATA
    Your access to the CAD data that MISUMI Corporation (hereinafter referred to as the Company) posts on this site (including 3D CAD data, intermediate 3D CAD data and 2D CAD data; hereinafter referred to as the Data) are of products manufactured and/or sold by the Company (hereinafter referred to as the Products) assumes that you have read and accepted these terms and conditions which govern your use of the Data. If you do not agree to these terms and conditions, you must stop using this website and the Data. You must not use the Data for any unlawful purpose or in any manner inconsistent with these terms and conditions.
    1. CAD Data
    The Data is prepared for assisting the Company's users in the CAD design process by providing dimensions and other Product information. In order to provide the best speed and stability working within this site, the Product drawings were simplified to reduce the size of the Data. For instance, some of the Products are shown without the oil groove shape, screws or spring shape. Also, please be aware that the tolerance, surface roughness and/or chamfer of the Data may vary from the actual Products.
    2. Disclaimer on Data
    While the Company has carefully prepared the Data, accuracy of the Data is not guaranteed and is subject to the variances as described above. The Company may also modify, add or delete the Data at any time without prior notice. The Company assumes no liability for any direct, indirect, consequential or special damages that you may claim resulted from your use of the Data or any changes to or deletions of the Data regardless of the reason. The Company provides no warranty as to the quality, accuracy, functionality, safety or reliability of the combination of Products and parts. Example applications and combinations of the Products are provided for illustrative purposes only.
    3. Copyright
    Copyrights to the content and the Data belong to the Company or the manufacturers of the Products. The said copyright is protected by the Copyright Act and international treaties. The use (including duplication, modification, uploading, posting, transmission, distribution, licensing, sales and publishing) of the Data except for the purpose to use the Data described above without prior approval of the Company is not allowed. The Data cannot be used for any purposes (including sales promotion) except for designing your machine. If you violate this provision or the laws or regulations, the Company may prohibit you from the use of the Data, the Company’s site and/or take legal action. So long as you comply with these terms and conditions, the Company grants to you a non-exclusive, non-transferable, revocable license to access and use the Data for the sole purpose of assisting you in designing machines that incorporate products.
    In case that the CAD data is found to have been to be used for any purpose other than mentioned above or against the related laws, MISUMI may take legal actions, including the one for blocking the involved user from using CAD data and from accessing to the MISUMI site.
    4. Disclaimer of Warranty
    ANY AND ALL CONTENT APPEARING ON THIS WEB SITE IS PROVIDED FOR INFORMATIONAL PURPOSES ONLY. THIS WEB SITE, ITS CONTENT AND ITS LINKS ARE PROVIDED ON AN "AS IS" AND "AS AVAILABLE" BASIS AND ARE USED ONLY AT YOUR SOLE RISK, TO THE FULLEST EXTENT PERMISSIBLE BY LAW. THE COMPANY DISCLAIMS ALL WARRANTIES, EXPRESS OR IMPLIED, OF ANY KIND, REGARDING THIS WEB SITE (INCLUDING ITS CONTENT, HARDWARE, SOFTWARE AND LINKS), INCLUDING AS TO FITNESS FOR A PARTICULAR PURPOSE, MERCHANTABILITY, TITLE, NON INFRINGEMENT, RESULTS, ACCURACY, COMPLETENESS, ACCESSIBILITY, COMPATIBILITY, SECURITY AND FREEDOM FROM COMPUTER VIRUS. THE COMPANY WILL NOT BE LIABLE FOR ANY DAMAGES OR LOSSES, INCLUDING DIRECT, INDIRECT, CONSEQUENTIAL, SPECIAL, INCIDENTAL OR PUNITIVE DAMAGES AND/OR LOST PROFITS, IN CONNECTION WITH USE OF THE INTERNET, THIS WEB SITE, ITS CONTENT OR ITS LINKS
    Further, the Company will not be liable to you for any failure or delay by the Company to provide access to the Data or any of its obligations under these terms and conditions where such failure or delay is the direct or indirect result of any circumstances beyond the Company's reasonable control (and the Company's obligations will be suspended for the duration of such circumstances).

    CAD Download (Unit Assembly)

    CAD Download: File Format
    生成

    Thank you for downloading the data.

    Click the Good IDEA! button when you find interesting design tips.


    This data is utilized in order to list more useful application examples in the future.

    CAD Data Limitations

    1. Assembly data shows the assembly drawings in the concept design phase. The sole purpose of the data is to explain the structure and functionality of the assembly and is not considered nor to be used as a final design.
      You will need to edit the Data so that it meets your specific design conditions.
    2. Unit assembly Data consists of some sub-assemblies.
      It is configured so that each sub-assembly unit can be used as it is or edited.
    3. * The part in the frame is a sub-assembly unit.

    4. The Data for fabricated parts is based on easy-to-edit dimensions and shapes in sketches and histories.
    5. The Data including the third-part components are made by the Company.

    Page top

  • * Unit assembly Data consists of some sub-assemblies.
       It is configured so that each sub-assembly unit can be used as it is or edited.

Application Overview

Purpose

  • Purpose
    • Inspects workpieces that are placed on the index table at three different locations.
  • Operation
    • As the index table rotates clockwise 90 degrees to the next inspection position, the work piece holders simultaneously rotate 90 degrees counterclockwise.

Target workpiece

  • Shape: circuit board.
  • Size: W80 x D80 x H12 mm
  • Weight: 40 g

Design Specifications

Operating Conditions or Design Requirements

  • Rotation angle: 90 degrees, 4 positions
  • Outer dimensions: W390 x D480 x H217 mm

Required Performance

  • Positioning accuracy: ±0.1 degree
  • Load weight: approx. 8.7 kg

Selection Criteria for Main Components

  • For this application, we will select a safety factor of 3. Therefore, the index table must have an allowable thrust load of 226N (or higher) and an allowable moment of inertia of 0.15kg·m2 (or higher).

Design Evaluation

Verification of main components

  • The thrust load and moment of inertia of the index table are verified based on the workpiece weight and moment of inertia.
  • Thrust load and moment of inertia of index table
    • Conditional value: mass of workpiece: W = 8.7 kg, gravitational acceleration: g = 9.8 m/s², safety factor: S = 3, allowable moment of inertia of index table: 0.17 kg·m²
    • For the workpiece mass of 8.7 kg, the thrust load when considering the safety factor is F = 3 x 8.7 x 9.8 = 226 N, which is smaller than the allowable thrust load (800 N) of the selected index table. Therefore, the safety factor is verified.
    • From the moment of inertia of workpiece: M = 0.050 [kg·m²], the moment of inertia when considering the safety factor (S = 3) is M1 = 3 x 0.05 = 0.15 kg·m², which is smaller than the allowable moment (0.17kg·m²) of inertia of the selected index table. Therefore, the safety factor is verified.

Other Design Consideration

  • A shaft and collar is used to affix the index table.

Explore Similar Application Examples

Page - / -

Part List

No. Part Name Sample Picture MISUMI Part Number
(click the Part Number below for details)
Quantity
1 Timing Pulleys ATP44MXL019-B-P10 4
2 Timing Pulleys ATP44MXL019-B-P10-RFC 4
3 Timing Belts TBN134MXL019 4
4 Bearing W/Housing BGFRYB6700ZZ-29-S14 4
5 Bearing W/Housing BGFRYB6700ZZ-27-S12 4
6 Retaining Rings-External STWN10 8
7 Retaining Rings STWN5 4
8 Idler AFBD9-20 4
9 Shaft Supports STHRBT20 1
10 Shaft Collars SSCSTR16-15 1
11 Shaft Collars SSCSW8-12 4
13 Metal Washers WSSS8-3-5 8
14 Workpiece Guide WGLNC-20-6-10 16
  • The part list above only contains MISUMI parts.
    Part list download (CSV) includes MISUMI and third party components used in this example.
  • TERMS AND CONDITIONS FOR USE OF CAD DATA
    Your access to the CAD data that MISUMI Corporation (hereinafter referred to as the Company) posts on this site (including 3D CAD data, intermediate 3D CAD data and 2D CAD data; hereinafter referred to as the Data) are of products manufactured and/or sold by the Company (hereinafter referred to as the Products) assumes that you have read and accepted these terms and conditions which govern your use of the Data. If you do not agree to these terms and conditions, you must stop using this website and the Data. You must not use the Data for any unlawful purpose or in any manner inconsistent with these terms and conditions.
    1. CAD Data
    The Data is prepared for assisting the Company's users in the CAD design process by providing dimensions and other Product information. In order to provide the best speed and stability working within this site, the Product drawings were simplified to reduce the size of the Data. For instance, some of the Products are shown without the oil groove shape, screws or spring shape. Also, please be aware that the tolerance, surface roughness and/or chamfer of the Data may vary from the actual Products.
    2. Disclaimer on Data
    While the Company has carefully prepared the Data, accuracy of the Data is not guaranteed and is subject to the variances as described above. The Company may also modify, add or delete the Data at any time without prior notice. The Company assumes no liability for any direct, indirect, consequential or special damages that you may claim resulted from your use of the Data or any changes to or deletions of the Data regardless of the reason. The Company provides no warranty as to the quality, accuracy, functionality, safety or reliability of the combination of Products and parts. Example applications and combinations of the Products are provided for illustrative purposes only.
    3. Copyright
    Copyrights to the content and the Data belong to the Company or the manufacturers of the Products. The said copyright is protected by the Copyright Act and international treaties. The use (including duplication, modification, uploading, posting, transmission, distribution, licensing, sales and publishing) of the Data except for the purpose to use the Data described above without prior approval of the Company is not allowed. The Data cannot be used for any purposes (including sales promotion) except for designing your machine. If you violate this provision or the laws or regulations, the Company may prohibit you from the use of the Data, the Company’s site and/or take legal action. So long as you comply with these terms and conditions, the Company grants to you a non-exclusive, non-transferable, revocable license to access and use the Data for the sole purpose of assisting you in designing machines that incorporate products.
    In case that the CAD data is found to have been to be used for any purpose other than mentioned above or against the related laws, MISUMI may take legal actions, including the one for blocking the involved user from using CAD data and from accessing to the MISUMI site.
    4. Disclaimer of Warranty
    ANY AND ALL CONTENT APPEARING ON THIS WEB SITE IS PROVIDED FOR INFORMATIONAL PURPOSES ONLY. THIS WEB SITE, ITS CONTENT AND ITS LINKS ARE PROVIDED ON AN "AS IS" AND "AS AVAILABLE" BASIS AND ARE USED ONLY AT YOUR SOLE RISK, TO THE FULLEST EXTENT PERMISSIBLE BY LAW. THE COMPANY DISCLAIMS ALL WARRANTIES, EXPRESS OR IMPLIED, OF ANY KIND, REGARDING THIS WEB SITE (INCLUDING ITS CONTENT, HARDWARE, SOFTWARE AND LINKS), INCLUDING AS TO FITNESS FOR A PARTICULAR PURPOSE, MERCHANTABILITY, TITLE, NON INFRINGEMENT, RESULTS, ACCURACY, COMPLETENESS, ACCESSIBILITY, COMPATIBILITY, SECURITY AND FREEDOM FROM COMPUTER VIRUS. THE COMPANY WILL NOT BE LIABLE FOR ANY DAMAGES OR LOSSES, INCLUDING DIRECT, INDIRECT, CONSEQUENTIAL, SPECIAL, INCIDENTAL OR PUNITIVE DAMAGES AND/OR LOST PROFITS, IN CONNECTION WITH USE OF THE INTERNET, THIS WEB SITE, ITS CONTENT OR ITS LINKS
    Further, the Company will not be liable to you for any failure or delay by the Company to provide access to the Data or any of its obligations under these terms and conditions where such failure or delay is the direct or indirect result of any circumstances beyond the Company's reasonable control (and the Company's obligations will be suspended for the duration of such circumstances).

    CAD Download (Unit Assembly)

    CAD Download: File Format
    生成

    Thank you for downloading the data.

    Click the Good IDEA! button when you find interesting design tips.


    This data is utilized in order to list more useful application examples in the future.

    CAD Data Limitations

    1. Assembly data shows the assembly drawings in the concept design phase. The sole purpose of the data is to explain the structure and functionality of the assembly and is not considered nor to be used as a final design.
      You will need to edit the Data so that it meets your specific design conditions.
    2. Unit assembly Data consists of some sub-assemblies.
      It is configured so that each sub-assembly unit can be used as it is or edited.
    3. * The part in the frame is a sub-assembly unit.

    4. The Data for fabricated parts is based on easy-to-edit dimensions and shapes in sketches and histories.
    5. The Data including the third-part components are made by the Company.

    Page top

Page top