(!) Since support from Microsoft will end on January 14 2020, Windows 7 user might not be able to use MISUMI website effectively. Please consider to update your system as ‘MISUMI Website system requirement’.

ideanote
inCAD Library

Please read before use

What is inCAD Library?

  • Helpful application examples for mechanical engineers.

The Concept of inCAD Library

  • Online application library with a range of ideas for all manufacturing industries.
  • Save design time and learn new design applications when you are concepting new machines.

Disclaimer

  • MISUMI may not offer all parts in each application design. Available parts can only be purchased separately not as a unit shown in each application design.
  • MISUMI does not guarantee quality, accuracy, functionality, safety or reliability for the combination of the parts in each application example. Accept these points prior to use.
  • 2014 Copyright MISUMI
  • The data cannot be used for any purposes (including sales promotion) except for designing your machine.
  • All associated CAD is free. Misumi reserves the right at its sole discretion to cancel, terminate or modify this offer.
  • MISUMI may change, add or delete application examples posted without prior notice.
  • MISUMI assumes no responsibilities for any damage incurred resulting from your use of the Service or any change, addition or deletion by MISUMI of the application examples for any reason whatsoever.

inCAD Library Features

  1. Get great new design ideas for these application examples.
  2. Over 300 design application ideas
    collected from dozens of industries!

  3. Find application examples quickly! Search by function, workpiece shape, etc.

  4. Download the CAD models for each application example.
  5. Log in to download free CAD models.
    Download CAD for the entire application example!

Good IDEA! button

Click the Good IDEA! Button when you like an application example!

*Can only be clicked once per application example.

  • Upper right corner on the page of application example details

  • Pop-up dialog for CAD data downloading

Page top

Keyword Search
No. Search

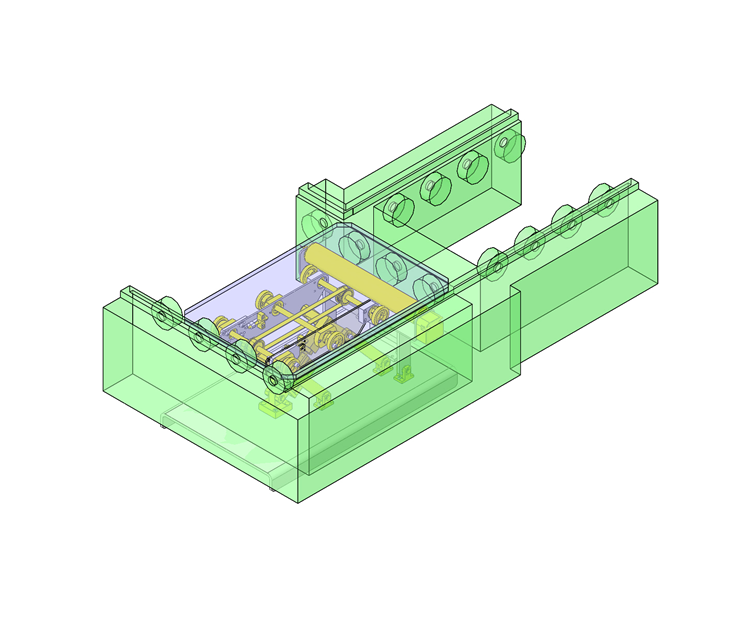
No.000216 90-Degree Pallet Transfer Mechanism

Transferring pallets at 90-degree without de-energizing the conveyors.

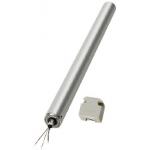
Motor Rollers

Product name Powered Rollers (with built-In Motor)
Part number MOR42.7-300-10
Features Conveyor Roller with a built-in motor and a reducer. This does not require the separate space to be held for the motor and thus, helps space saving.
* Orange colored cells in the table below indicate the part numbers used in this example.

Selection criteria

Space saving design - no need to prepare a motor space separately

Back to page top

Available sizes

■Powered Rollers (with built-In Motor)

Roller Dia. Length Nominal
Velocity
Power Supply Rated Current Speed(m/min) Tangential Force (N) Torque(N・m) Roller Strength
50Hz 60Hz 50Hz 60Hz 50Hz 60Hz Length
300
Length
400
Length
500
Rating Starting Rating Starting Rating Starting Rating Starting
38 300

400

500
10 Three-phase
200V
50/60Hz
input
16/12W
0.055/
0.050
(A)
10.4 13.1 16.7 12.4 12.4 31.3 31.8 70.9 23.6 59.6 343 294 294
15 14.2 16.1 12.3 9.2 9.2 30.9 23.3 75.3 17.5 58.7
20 22.2 25.2 7.8 5.8 5.8 19.7 14.9 48.0 11.1 37.4
42.7 300

400

500
10 Three-phase
200V
50/60Hz
input
18/17W
0.065/
0.062
(A)
12.3 14.0 14.2 14.2 14.2 23.4 30.3 65.5 30.3 50.1 490 441 392
15 18.2 20.7 9.6 9.6 9.6 15.9 20.5 44.4 20.5 33.9
20 24.8 28.3 7.0 7.0 7.0 11.6 15.0 32.5 15.0 24.8
57 300

400

500
10 Three-phase
200V
50/60Hz
input
33/27W
0.120/
0.100
(A)
11.2 13.3 37.0 37.0 37.0 78.4 126.8 236.8 105.4 223.4 980 980 784
15 12.4 14.8 33.5 33.5 33.5 67.6 114.5 214.1 95.4 192.6
20 17.0 20.2 24.5 24.5 24.5 49.5 83.7 156.7 69.8 141.0

Back to page top

Selection steps

(1) Calculate the required tangential force (roller carrying capability)

♦ Formula for the Required Tangential Force
Required tangential force (N) = 9.8 (constant value) x conveyed object weight (kg) x rolling friction coefficient

♦ Rolling Friction Coefficient Table

Wood Metal Cardboard Plastic Rubber Lining
0.02~0.05 0.01~0.02 0.05~1 0.02~0.04 0.1

Above values vary depending on the roller pitch or the roller surface conditions, etc.

Calculation example) When carrying a cardboard box weighing 40kg:
From the above Rolling Friction Coefficient Table, maximum friction coefficient for cardboard is 0.10.
Required tangential force=9.8×40kg×0.10=39.2N
* Rolling friction coefficient depends on the material of the object. Refer to the table above.

(2) Select the model temporarily
temporarily select the model that matches the speed from the specification table.
Ex. When carrying the objects at the speed of 20m/min, the part number is MOR57−(length)-20.

(3) Determine the number of required rollers
Determine the number of required rollers considering the following 2 elements.

●·Motor roller tangential force (start-up or at rated output) ● Carried weight and allowable static load of the roller (Please see the specification table "Roller Strength (N)".)

♦ Calculating the required tangential force
Carrying capability (N) = Starting tangential force of the motor roller (N) x 0.9 (constant value)

♦ Determine the number of required rollers
The number of required rollers = required tangential force (N) / carrying capability (N)

Calculation example) Required tangential force for conveying the object is 39.2N from the sample calculation above.
For the part number MOR57-(length)-20:
●·Carrying capability is 55 (N) (starting tangential force) x 0.9 = 49.5 (N).
● The number of required rollers is 39.2N (required tangential force) / 49.5N (carrying capability) = 0.79pcs. <- Can be transported by one roller

(4) Determine the length of the rollers

●·From the size of the bottom surface (length x width) of the object
Calculation example) When the length of the bottom surface is 300 mm and the width is 400 mm:
● The width of the object is 400mm + Margin 100mm = 500mm.
It follows that in this case, the part number should be MOR57-500-20.

Caution in Selection
● The calculated value using carrying tangential force gives the minimum value for required tangential force needed to carry the work.
Carrying capability could vary depending on roller level differences, carried object bottom surface shape (conditions),
material and motor roller speed, etc. Please use more rollers depending on usage conditions and considering safety.
If rated speed is important, use rated tangential force for calculation.
● When motor rollers are loaded at all times, use rated tangential force in calculating for selection.
● The object is assumed to start from on the motor rollers.

■Features

- The built-in motor and gear will save space
of the drive section.
- Requires no maintenance such as lubrication.
- Using the multiple motor rollers according to the object size
can avoid stopping the production line
even if one roller fails.

Back to page top

Shaft Collar

Product name Shaft Collars - 2 Tapped Holes
Part number PSCSW10-10
* Orange colored cells in the table below indicate the part numbers used in this example.

Selection criteria

Easy-to-use stopper in the axial direction for shafts

Back to page top

Available sizes

■Shaft Collars - 2 Tapped Holes

Material Surface Treatment
1045 Carbon Steel Black Oxide
Electroless Nickel Plating
304 Stainless Steel -

■Sizes and Dimensions

I.D.
(mm)
Thickness
(mm)
O.D.
(mm)
6 8 20
10
8 8 25
10
12 30
10 8
10
12
12 8
10
12
15 35
13 10 30
12
15 10 34
12 35
15 40
16 10 35
12
15 40
18・20 10
12
15 45
25 12
15 50
30 15 55

Back to page top

Accuracy Info

■Accuracy of shaft collars

I.D.
(mm)
I.D. Tolerance
(mm)
6 +0.05
+0.01
8
10
12
13
15
16
18・20
25
30

Back to page top

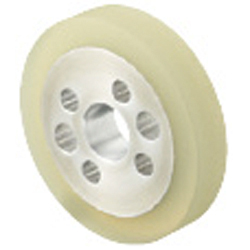
Urethane Rollers

Product name Urethane Rollers - Side Through Hole
Part number ULSH-40-10
* Orange colored cells in the table below indicate the part numbers used in this example.

Selection criteria

The roller guide that can transport the object without damaging it.

Back to page top

Available sizes

■Urethane Rollers - Side Through Hole

Core Lining Hardness
5052 Aluminum Alloy Urethane A90

■Sizes and Dimensions

O.D. I.D. Side Through Hole
(4-Hole)
Side Through Hole
(2-Hole)
φ40 φ10 φ4.5 φ5.5
φ12 φ5.5 φ5.5
φ50 φ12
φ15
φ60 φ15
φ20 φ6.5 φ6.5
φ70 φ15 φ5.5 φ5.5
φ20 φ6.5 φ6.5
φ80 φ20
φ25

Back to page top

IDEA NOTE Powering drive roller.

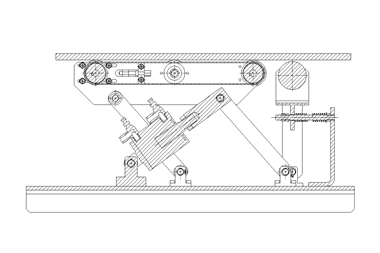
The motor roller is fixed to the oscillating lever with a spring load applied to it, and the driving force is obtained by pressing the drive roller against the motor roller. The drive roller rotates when pressed with the motor roller and stops when released from it.

IDEA NOTE Compact link design.

By utilizing a cylinder and link, a mechanism with limited height is achieved.

  • TERMS AND CONDITIONS FOR USE OF CAD DATA
    Your access to the CAD data that MISUMI Corporation (hereinafter referred to as the Company) posts on this site (including 3D CAD data, intermediate 3D CAD data and 2D CAD data; hereinafter referred to as the Data) are of products manufactured and/or sold by the Company (hereinafter referred to as the Products) assumes that you have read and accepted these terms and conditions which govern your use of the Data. If you do not agree to these terms and conditions, you must stop using this website and the Data. You must not use the Data for any unlawful purpose or in any manner inconsistent with these terms and conditions.
    1. CAD Data
    The Data is prepared for assisting the Company's users in the CAD design process by providing dimensions and other Product information. In order to provide the best speed and stability working within this site, the Product drawings were simplified to reduce the size of the Data. For instance, some of the Products are shown without the oil groove shape, screws or spring shape. Also, please be aware that the tolerance, surface roughness and/or chamfer of the Data may vary from the actual Products.
    2. Disclaimer on Data
    While the Company has carefully prepared the Data, accuracy of the Data is not guaranteed and is subject to the variances as described above. The Company may also modify, add or delete the Data at any time without prior notice. The Company assumes no liability for any direct, indirect, consequential or special damages that you may claim resulted from your use of the Data or any changes to or deletions of the Data regardless of the reason. The Company provides no warranty as to the quality, accuracy, functionality, safety or reliability of the combination of Products and parts. Example applications and combinations of the Products are provided for illustrative purposes only.
    3. Copyright
    Copyrights to the content and the Data belong to the Company or the manufacturers of the Products. The said copyright is protected by the Copyright Act and international treaties. The use (including duplication, modification, uploading, posting, transmission, distribution, licensing, sales and publishing) of the Data except for the purpose to use the Data described above without prior approval of the Company is not allowed. The Data cannot be used for any purposes (including sales promotion) except for designing your machine. If you violate this provision or the laws or regulations, the Company may prohibit you from the use of the Data, the Company’s site and/or take legal action. So long as you comply with these terms and conditions, the Company grants to you a non-exclusive, non-transferable, revocable license to access and use the Data for the sole purpose of assisting you in designing machines that incorporate products.
    In case that the CAD data is found to have been to be used for any purpose other than mentioned above or against the related laws, MISUMI may take legal actions, including the one for blocking the involved user from using CAD data and from accessing to the MISUMI site.
    4. Disclaimer of Warranty
    ANY AND ALL CONTENT APPEARING ON THIS WEB SITE IS PROVIDED FOR INFORMATIONAL PURPOSES ONLY. THIS WEB SITE, ITS CONTENT AND ITS LINKS ARE PROVIDED ON AN "AS IS" AND "AS AVAILABLE" BASIS AND ARE USED ONLY AT YOUR SOLE RISK, TO THE FULLEST EXTENT PERMISSIBLE BY LAW. THE COMPANY DISCLAIMS ALL WARRANTIES, EXPRESS OR IMPLIED, OF ANY KIND, REGARDING THIS WEB SITE (INCLUDING ITS CONTENT, HARDWARE, SOFTWARE AND LINKS), INCLUDING AS TO FITNESS FOR A PARTICULAR PURPOSE, MERCHANTABILITY, TITLE, NON INFRINGEMENT, RESULTS, ACCURACY, COMPLETENESS, ACCESSIBILITY, COMPATIBILITY, SECURITY AND FREEDOM FROM COMPUTER VIRUS. THE COMPANY WILL NOT BE LIABLE FOR ANY DAMAGES OR LOSSES, INCLUDING DIRECT, INDIRECT, CONSEQUENTIAL, SPECIAL, INCIDENTAL OR PUNITIVE DAMAGES AND/OR LOST PROFITS, IN CONNECTION WITH USE OF THE INTERNET, THIS WEB SITE, ITS CONTENT OR ITS LINKS
    Further, the Company will not be liable to you for any failure or delay by the Company to provide access to the Data or any of its obligations under these terms and conditions where such failure or delay is the direct or indirect result of any circumstances beyond the Company's reasonable control (and the Company's obligations will be suspended for the duration of such circumstances).

    CAD Download (Unit Assembly)

    CAD Download: File Format
    生成

    Thank you for downloading the data.

    Click the Good IDEA! button when you find interesting design tips.


    This data is utilized in order to list more useful application examples in the future.

    CAD Data Limitations

    1. Assembly data shows the assembly drawings in the concept design phase. The sole purpose of the data is to explain the structure and functionality of the assembly and is not considered nor to be used as a final design.
      You will need to edit the Data so that it meets your specific design conditions.
    2. Unit assembly Data consists of some sub-assemblies.
      It is configured so that each sub-assembly unit can be used as it is or edited.
    3. * The part in the frame is a sub-assembly unit.

    4. The Data for fabricated parts is based on easy-to-edit dimensions and shapes in sketches and histories.
    5. The Data including the third-part components are made by the Company.

    Page top

  • * Unit assembly Data consists of some sub-assemblies.
       It is configured so that each sub-assembly unit can be used as it is or edited.

Application Overview

Purpose

  • Purpose
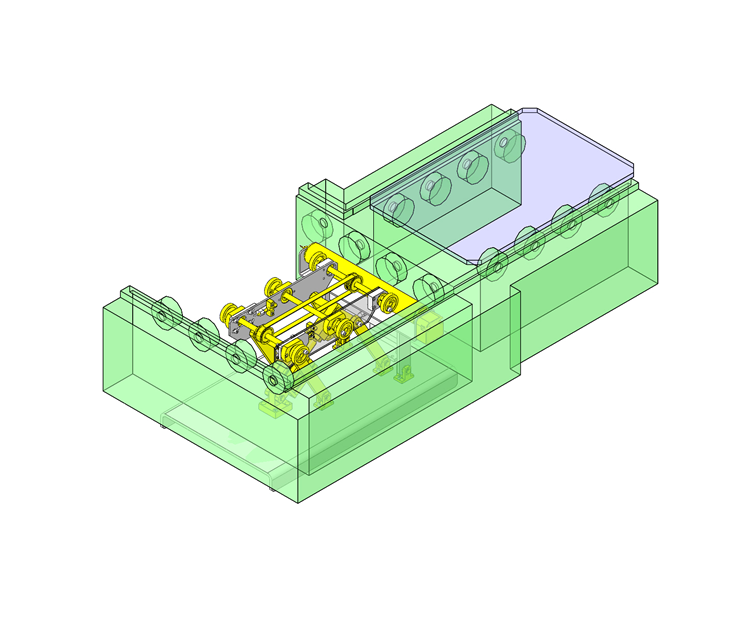
    • To transfer pallet at 90-degree angle from one conveyor to another.
  • Operation
    • At the transfer position, bellow the conveying height, is the lifting and transfer mechanism. When a pallet is in the transfer position the cylinder moves the unit and lifts the workpiece from conveyor. To make 90-degree transfer drive roller pulls the workpiece onto the next station. Besides drive roller (motor powered) workpiece is also supported by 3 sets of free-wheeling rollers as part of the lift and transfer unit. When the pallet leaves, the transfer unit cylinders retract and transfer unit is once again below the conveying height.

Target workpiece

  • Pallet
  • Size:W450×D300×H10mm
  • Weight:3.7kg
  • Load capacity:8kg

Design Specifications

Operating Conditions or Design Requirements

  • Operational Specifications
    • To conduct right angle transfer of pallets smoothly and prevent the conveyor rollers from being damaged, the transfer action should be started after the pallet is lifted.
    • Transfer speed: 12 to 14 (m/min)
  • Dimensions
    • W500×D300×H250mm

Selection Criteria for Main Components

  • A cylinder is selected based on the pallet and load capacity.
  • A motor roller is selected based on load capacity.
  • The drive roller diameter is selected based on needed transfer speed.

Design Evaluation

Verification of main components

  • A motor roller and a cylinder is selected based on the workpiece load.
    • Conditional value: spring constant k = 9.8N/mm, spring free length X0 = 65mm, spring length when roller makes contact X1 = 47.2mm, distance between roller base rotation shaft and spring part Lk1 = 83mm, distance between roller base and roller contact point Lk2 = 158mm, air cylinder thrust at 0.5 MPa Fs0 = 402N, cylinder efficiency η = 0.8, cylinder thrust angle θ1 = 36°, distance between cylinder link rotation shaft and cylinder thrust point Ls1 = 150mm, distance between cylinder link and roller contact point Ls2 = 140.6mm, angle formed by motor roller shaft and drive roller shaft θ2 = 30.4°, angle formed by cylinder link and cylinder thrust direction θ3 ≈ 90°, motor roller strength Fm = 490N, motor roller diameter D1 = 42.7mm, drive roller diameter D2 = 40mm, motor roller speed V1 = 12.7m/min, friction coefficient between drive roller and pallet μ1 = 0.1, friction coefficient between motor roller and drive roller μ2 = 0.6 (metal and rubber), rated tangential force of motor roller N1 = 14.2N, workpiece weight M = 3.7 + 8 = 11.7kg, gravitational acceleration g = 9.8m/s²
  • Selection of motor roller
    • Drive roller strength
      [Force by spring]
      If we put Fk1N as spring force and Fk2N as the force applied to the roller contact point, from the balance of moment around the roller base rotation shaft,
      Fk1×Lk1=Fk2×Lk2
      Fk2={k×(X0-X1)}×Lk1/Lk2={9.8×(65-47.2)}×83/158=91.6N
      Therefore, the force in the normal direction applied by the spring to the roller contact face:Fk=Fk2×cosθ2=91.6×cos30.4=79N
      [Force by cylinder]
      If we put Fs1 as cylinder thrust and Fs2 as force applied to the roller contact point by the cylinder, from θ3 ≈ 90° and the balance of moment around the cylinder link rotation shaft,
      Fs1×Ls1=Fs2×Ls2
      Fs2={P0×η}×Ls1/Ls2={402×0.8}×150/140.6=343.1N
      Angle formed by the cylinder thrust direction, drive roller shaft, and motor roller shaft:θ4=θ1+θ2=66.4°
      Therefore, the force in the normal direction applied to the roller contact face by the cylinder:Fs=Fs2×cosθ4=343.1×cos66.4=137.4N
      [Confirmation of roller strength]
      From Fs > Fk, push force to motor roller:F=Fk=79N<490N=Fm
      ⇒As Fm > Fk, the condition is met.
    • Transfer Speed
      As the roller is placed in between, considering the roller ratio,
      transfer speed: V2 = V1 x D1/D2 = 12.7 x 42.7/40 = 13.5m/min, hence, the condition (12 to 14m/min) is met.
    • Pull force of drive motor
      Maximum transmission force of motor roller and drive roller: P = F x μ2 = 79 x 0.6 = 47.4N
      As N1 < P, the tangential force of the motor roller is transmitted to the drive roller without loss.
      [Roller transfer capability]
      Required tangential force of drive roller: N2 = 9.8 x M x μ1 = 9.8 x 11.7 x 0.1 = 11.5N
      Considering the roller ratio, the required tangential force of the motor roller: N3 = N2 x D1/D2 = 11.5 x 43.7/40 = 12.3N < 14.2N = N1
      ⇒As N1 > N3, the condition is met.
  • Selection of air cylinder
    • Confirmation of lift cylinder thrust
      As links are used in this mechanism,
      Lifting power: Fu = Fs0 x η x sinθ1 = 402 x 0.8 x sin36° = 189N
      Workpiece weight:M×g=114.7N<189N=Fu
      ⇒The condition is met.

Other Design Consideration

  • Air cylinder and links allows lift unit to fully engage the pallet and allows drive roller to stay in contact with pallet during transfer.
  • Although this mechanism is designed assuming the transfer conveyor height as 200 mm, an arrangement with a lower design height is also possible.
  • Movement in the direction opposite to this setting is also possible.

Explore Similar Application Examples

Page - / -

Part List

No. Part Name Sample Picture MISUMI Part Number
(click the Part Number below for details)
Quantity
1 Hinge Bases HGCCJM10-A22-W11-H22 4
2 Hinge Bases HGCCJM10-A22-W10-H22 2
3 Hinge Bases HGCNM12-W16-H35 1
4 Extra Thin Resin Washers SWSPS20-10-1.0 20
5 Air Cylinders MSCCA40-30 1
6 Brackets For Air Cylinders CTKB40 1
7 Knuckle Joint FNNM14-1.5-D12-B15-U30 1
8 Oil Free Bushings MDZB10-15 2
9 Links LNMWM10-10-150 4
10 Metal Washers WSSM16-10-2 4
11 Precision Pivot Pins CDG10-22 6
12 Rotary Shaft PSFRW10-120-M5-N5 2
13 Collars NCLM10-15-41 2
14 Collars NCLM10-15-98 1
15 Rollers MOR42.7-300-10 1
16 Compression Springs WH13-65 1
17 Bearing W/ Housing BGCR6000ZZ 4
18 Deep Groove Ball Bearings B6000ZZ 2
19 Rotary Shaft PSFHKR10-200-KA91-A25 2
20 Rotary Shaft PSFHR10-200 1
21 Parallel Keys KES3-25 2
22 High Torque Timing Pulleys GPA34GT3090-B-N10 2
23 Timing Belts GBN5823GT-90 1
24 Metal Washers TWSSM14-10-9 4
25 Metal Washers WSSM14-10-5 2
26 Shaft Collars PSCSW10-10 6
27 Rollers ULSH-40-10 6
28 Blocks For Adjusting Bolts AJKCM5-6 2
29 Adjusting Bolts AJSTM5-25 2
30 Sensors for Air Cylinders MD13L1 2
31 Flow Rate Control Valves SPSNL6-1 2
32 Collars NCLM10-14-11 2
33 Retaining Rings-C-Type RTWS26 2
  • The part list above only contains MISUMI parts.
    Part list download (CSV) includes MISUMI and third party components used in this example.
  • TERMS AND CONDITIONS FOR USE OF CAD DATA
    Your access to the CAD data that MISUMI Corporation (hereinafter referred to as the Company) posts on this site (including 3D CAD data, intermediate 3D CAD data and 2D CAD data; hereinafter referred to as the Data) are of products manufactured and/or sold by the Company (hereinafter referred to as the Products) assumes that you have read and accepted these terms and conditions which govern your use of the Data. If you do not agree to these terms and conditions, you must stop using this website and the Data. You must not use the Data for any unlawful purpose or in any manner inconsistent with these terms and conditions.
    1. CAD Data
    The Data is prepared for assisting the Company's users in the CAD design process by providing dimensions and other Product information. In order to provide the best speed and stability working within this site, the Product drawings were simplified to reduce the size of the Data. For instance, some of the Products are shown without the oil groove shape, screws or spring shape. Also, please be aware that the tolerance, surface roughness and/or chamfer of the Data may vary from the actual Products.
    2. Disclaimer on Data
    While the Company has carefully prepared the Data, accuracy of the Data is not guaranteed and is subject to the variances as described above. The Company may also modify, add or delete the Data at any time without prior notice. The Company assumes no liability for any direct, indirect, consequential or special damages that you may claim resulted from your use of the Data or any changes to or deletions of the Data regardless of the reason. The Company provides no warranty as to the quality, accuracy, functionality, safety or reliability of the combination of Products and parts. Example applications and combinations of the Products are provided for illustrative purposes only.
    3. Copyright
    Copyrights to the content and the Data belong to the Company or the manufacturers of the Products. The said copyright is protected by the Copyright Act and international treaties. The use (including duplication, modification, uploading, posting, transmission, distribution, licensing, sales and publishing) of the Data except for the purpose to use the Data described above without prior approval of the Company is not allowed. The Data cannot be used for any purposes (including sales promotion) except for designing your machine. If you violate this provision or the laws or regulations, the Company may prohibit you from the use of the Data, the Company’s site and/or take legal action. So long as you comply with these terms and conditions, the Company grants to you a non-exclusive, non-transferable, revocable license to access and use the Data for the sole purpose of assisting you in designing machines that incorporate products.
    In case that the CAD data is found to have been to be used for any purpose other than mentioned above or against the related laws, MISUMI may take legal actions, including the one for blocking the involved user from using CAD data and from accessing to the MISUMI site.
    4. Disclaimer of Warranty
    ANY AND ALL CONTENT APPEARING ON THIS WEB SITE IS PROVIDED FOR INFORMATIONAL PURPOSES ONLY. THIS WEB SITE, ITS CONTENT AND ITS LINKS ARE PROVIDED ON AN "AS IS" AND "AS AVAILABLE" BASIS AND ARE USED ONLY AT YOUR SOLE RISK, TO THE FULLEST EXTENT PERMISSIBLE BY LAW. THE COMPANY DISCLAIMS ALL WARRANTIES, EXPRESS OR IMPLIED, OF ANY KIND, REGARDING THIS WEB SITE (INCLUDING ITS CONTENT, HARDWARE, SOFTWARE AND LINKS), INCLUDING AS TO FITNESS FOR A PARTICULAR PURPOSE, MERCHANTABILITY, TITLE, NON INFRINGEMENT, RESULTS, ACCURACY, COMPLETENESS, ACCESSIBILITY, COMPATIBILITY, SECURITY AND FREEDOM FROM COMPUTER VIRUS. THE COMPANY WILL NOT BE LIABLE FOR ANY DAMAGES OR LOSSES, INCLUDING DIRECT, INDIRECT, CONSEQUENTIAL, SPECIAL, INCIDENTAL OR PUNITIVE DAMAGES AND/OR LOST PROFITS, IN CONNECTION WITH USE OF THE INTERNET, THIS WEB SITE, ITS CONTENT OR ITS LINKS
    Further, the Company will not be liable to you for any failure or delay by the Company to provide access to the Data or any of its obligations under these terms and conditions where such failure or delay is the direct or indirect result of any circumstances beyond the Company's reasonable control (and the Company's obligations will be suspended for the duration of such circumstances).

    CAD Download (Unit Assembly)

    CAD Download: File Format
    生成

    Thank you for downloading the data.

    Click the Good IDEA! button when you find interesting design tips.


    This data is utilized in order to list more useful application examples in the future.

    CAD Data Limitations

    1. Assembly data shows the assembly drawings in the concept design phase. The sole purpose of the data is to explain the structure and functionality of the assembly and is not considered nor to be used as a final design.
      You will need to edit the Data so that it meets your specific design conditions.
    2. Unit assembly Data consists of some sub-assemblies.
      It is configured so that each sub-assembly unit can be used as it is or edited.
    3. * The part in the frame is a sub-assembly unit.

    4. The Data for fabricated parts is based on easy-to-edit dimensions and shapes in sketches and histories.
    5. The Data including the third-part components are made by the Company.

    Page top

Page top