(!) Since support from Microsoft will end on January 14 2020, Windows 7 user might not be able to use MISUMI website effectively. Please consider to update your system as ‘MISUMI Website system requirement’.

ideanote
inCAD Library

Please read before use

What is inCAD Library?

  • Helpful application examples for mechanical engineers.

The Concept of inCAD Library

  • Online application library with a range of ideas for all manufacturing industries.
  • Save design time and learn new design applications when you are concepting new machines.

Disclaimer

  • MISUMI may not offer all parts in each application design. Available parts can only be purchased separately not as a unit shown in each application design.
  • MISUMI does not guarantee quality, accuracy, functionality, safety or reliability for the combination of the parts in each application example. Accept these points prior to use.
  • 2014 Copyright MISUMI
  • The data cannot be used for any purposes (including sales promotion) except for designing your machine.
  • All associated CAD is free. Misumi reserves the right at its sole discretion to cancel, terminate or modify this offer.
  • MISUMI may change, add or delete application examples posted without prior notice.
  • MISUMI assumes no responsibilities for any damage incurred resulting from your use of the Service or any change, addition or deletion by MISUMI of the application examples for any reason whatsoever.

inCAD Library Features

  1. Get great new design ideas for these application examples.
  2. Over 300 design application ideas
    collected from dozens of industries!

  3. Find application examples quickly! Search by function, workpiece shape, etc.

  4. Download the CAD models for each application example.
  5. Log in to download free CAD models.
    Download CAD for the entire application example!

Good IDEA! button

Click the Good IDEA! Button when you like an application example!

*Can only be clicked once per application example.

  • Upper right corner on the page of application example details

  • Pop-up dialog for CAD data downloading

Page top

Keyword Search
No. Search

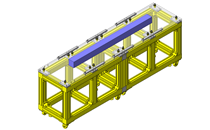
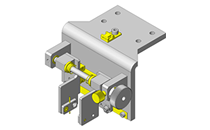
No.000049 Workpiece Seating Correction Unit

Corners of workpiece are pushed down for seating correction

Cylinder with guides

Product name Cylinders with Twin Guides
Part number MGCLB12-30
Features Cylinders having the guides on both ends for usability.
* Orange colored cells in the table below indicate the part numbers used in this example.

Selection criteria

Suitable as a workpiece lifting motion source.

Back to page top

Risk info.

Insufficient speed

Back to page top

Available sizes

■Cylinder with guides (Fixed stroke type)

Tube
I.D.
Bearing Slide bearing Linear bushing bearing Cylinder
width
Overall length
(Below+St)
Thickness
St 10 20 25 30 40 50 75 100 10 20 25 30 40 50 75 100
φ12 56 39 22
φ16 62 43 25
φ20 72 47 30
φ25 86 47.5 38
φ32 112 48
φ50 146 72 60

*Sensor sold separately

Back to page top

Accuracy Info

■Non-rotation accuracy of cylinder with guides

Non-rotation accuracy: Play due to a clearance between the guide rod and the bearing represented as a runout angle centered about the piston rod.

Tube
I.D.
Non-rotating accuracy of tip link bar
Slide bearing Linear bushing bearing
φ12 ±0.12° ±0.06°
φ16 ±0.10° ±0.06°
φ20 ±0.09° ±0.05°
φ25 ±0.08° ±0.05°
φ32 ±0.06° ±0.04°
φ50 ±0.05°

Back to page top

Performance info.

■Cylinder with guides operational pressure range

Min.operating pressure(MPa): 0.1
Max.operating pressure(MPa): 1.0
Proof pressure(MPa): 1.5

■Theoretical thrust

(N)

Tube
I.D.
Operation
direction
Operating pressure (MPa)
0.4 0.5
φ12 Push 45 57
Pull 34 42
φ16 Push 80 101
Pull 60 75
φ20 Push 126 157
Pull 94 118
φ25 Push 196 245
Pull 151 189
φ32 Push 322 402
Pull 241 302
φ50 Push 785 982
Pull 660 825

■Allowable rotational torque

Indicates a dynamic allowable value when a cylinder is operated with a torque applied on the tip of guide rod.

(N・m)

Tube
I.D.
Bearing
part number
Stroke
10 20 25 30 40 50 75 100
φ12 Slide bearing 0.50 0.40 - 0.33 0.28 0.25 0.77 0.65
Linear bushing 0.41 0.31 - 0.25 0.69 0.59 0.40 0.32
φ16 Slide bearing 0.91 0.75 - 0.64 0.56 0.49 1.25 1.06
Linear bushing 0.76 0.60 - 0.49 1.14 1.02 0.79 0.65
φ20 Slide bearing - 1.43 - 1.23 1.08 0.96 1.51 1.27
Linear bushing - 1.12 - 0.93 2.12 1.90 1.50 1.24
φ25 Slide bearing - 2.26 - 1.94 1.71 1.52 2.38 2.00
Linear bushing - 1.98 - 1.65 3.75 3.37 2.68 2.22
φ32 Slide bearing - - 6.71 - - 5.24 4.30 3.64
Linear bushing - - 3.61 - - 2.55 6.48 5.41
φ50 Slide bearing - - 13.0 - - 10.8 - 10.6

■ Allowable lateral load

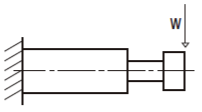
Dynamic allowable value when a cylinder is operated with lateral load W (perpendicular to the guide rod) at the tip of guide rod.

(N)

Tube
I.D.
Bearing
type
Stroke
10 20 25 30 40 50 75 100
φ12 Slide bearing 24 19 - 16 14 12 37 31
Linear bushing 20 15 - 12 33 29 19 16
φ16 Slide bearing 40 33 - 28 24 21 55 46
Linear bushing 33 26 - 21 50 44 34 28
φ20 Slide bearing - 52 - 45 39 35 55 46
Linear bushing - 41 - 34 77 69 54 45
φ25 Slide bearing - 69 - 60 52 47 73 62
Linear bushing - 61 - 51 115 104 82 68
φ32 Slide bearing - - 166 - - 131 107 91
Linear bushing - - 90 - - 34 162 135
φ50 Slide bearing - - 296 - - 245 - 241

Back to page top

CCTV lens

Product name CCTV Lenses
Part number MLCV12
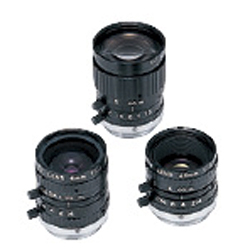
Features Lenses Applicable for use of Narrow Range Examinations in Close-up..
* Orange colored cells in the table below indicate the part numbers used in this example.

Selection criteria

A camera mounted lens used to examine the products.

Back to page top

Risk info.

Due to variations in cameras some trial and error will be required to select proper lens.

Back to page top

Available sizes

■Mega pixel CCTV lens

Body material: Aluminum
Surface treatment: Black anodize

Focal point Iris Largest compatible
CCD
Shooting distance
WD(mm)
TV
distortion
Overall length Body
O.D.
Connecting mechanism Weight(g)
6 1.4-close 1/2 inch 200-∞ −0.96% 37.5 φ32 C mount
68
8 1.4-close 2/3 inch 100-∞ −0.10% 28.2 φ33.5 70
12 1.4-close 2/3 inch 150-∞ −0.10% 28.2 65
16 1.4-close 2/3 inch 300-∞ −0.10% 28.2 65
25 1.4-close 2/3 inch 250-∞ −0.30% 31.5 φ29 45
35 2.0-close 2/3 inch 250-∞ −0.02% 38.5 55
50 2.8-close 2/3 inch 500-∞ −0.20% 38.5 55

Back to page top

Selection steps

■Mega-pixel CCTV lens selection steps

Determine the application conditions
Camera used, shooting distance (WD), Field of view (Subject), etc.

Calculate the focal length
Focal length (mm) = Shooting distance (WD) x CCD element size / Actual field of view

Temporary selection of compatible lens
Temporarily select a lens with focal distance with approx. calculated value.

Confirmation of required conditions
Verify that the field of view and subject resolution of the temporarily selected lens satisfies the conditions.
If not, consider using auto-extension ring.

Back to page top

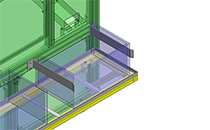
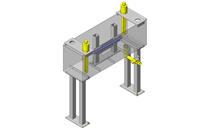
IDEA NOTE Workpiece positioning method

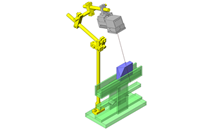
Workpieces on work table are positioned from two directions for the grippers to avoid interfering with the work guide.This enables gripper claws to grip the workpiece near the center of gravity.

  • TERMS AND CONDITIONS FOR USE OF CAD DATA
    Your access to the CAD data that MISUMI Corporation (hereinafter referred to as the Company) posts on this site (including 3D CAD data, intermediate 3D CAD data and 2D CAD data; hereinafter referred to as the Data) are of products manufactured and/or sold by the Company (hereinafter referred to as the Products) assumes that you have read and accepted these terms and conditions which govern your use of the Data. If you do not agree to these terms and conditions, you must stop using this website and the Data. You must not use the Data for any unlawful purpose or in any manner inconsistent with these terms and conditions.
    1. CAD Data
    The Data is prepared for assisting the Company's users in the CAD design process by providing dimensions and other Product information. In order to provide the best speed and stability working within this site, the Product drawings were simplified to reduce the size of the Data. For instance, some of the Products are shown without the oil groove shape, screws or spring shape. Also, please be aware that the tolerance, surface roughness and/or chamfer of the Data may vary from the actual Products.
    2. Disclaimer on Data
    While the Company has carefully prepared the Data, accuracy of the Data is not guaranteed and is subject to the variances as described above. The Company may also modify, add or delete the Data at any time without prior notice. The Company assumes no liability for any direct, indirect, consequential or special damages that you may claim resulted from your use of the Data or any changes to or deletions of the Data regardless of the reason. The Company provides no warranty as to the quality, accuracy, functionality, safety or reliability of the combination of Products and parts. Example applications and combinations of the Products are provided for illustrative purposes only.
    3. Copyright
    Copyrights to the content and the Data belong to the Company or the manufacturers of the Products. The said copyright is protected by the Copyright Act and international treaties. The use (including duplication, modification, uploading, posting, transmission, distribution, licensing, sales and publishing) of the Data except for the purpose to use the Data described above without prior approval of the Company is not allowed. The Data cannot be used for any purposes (including sales promotion) except for designing your machine. If you violate this provision or the laws or regulations, the Company may prohibit you from the use of the Data, the Company’s site and/or take legal action. So long as you comply with these terms and conditions, the Company grants to you a non-exclusive, non-transferable, revocable license to access and use the Data for the sole purpose of assisting you in designing machines that incorporate products.
    In case that the CAD data is found to have been to be used for any purpose other than mentioned above or against the related laws, MISUMI may take legal actions, including the one for blocking the involved user from using CAD data and from accessing to the MISUMI site.
    4. Disclaimer of Warranty
    ANY AND ALL CONTENT APPEARING ON THIS WEB SITE IS PROVIDED FOR INFORMATIONAL PURPOSES ONLY. THIS WEB SITE, ITS CONTENT AND ITS LINKS ARE PROVIDED ON AN "AS IS" AND "AS AVAILABLE" BASIS AND ARE USED ONLY AT YOUR SOLE RISK, TO THE FULLEST EXTENT PERMISSIBLE BY LAW. THE COMPANY DISCLAIMS ALL WARRANTIES, EXPRESS OR IMPLIED, OF ANY KIND, REGARDING THIS WEB SITE (INCLUDING ITS CONTENT, HARDWARE, SOFTWARE AND LINKS), INCLUDING AS TO FITNESS FOR A PARTICULAR PURPOSE, MERCHANTABILITY, TITLE, NON INFRINGEMENT, RESULTS, ACCURACY, COMPLETENESS, ACCESSIBILITY, COMPATIBILITY, SECURITY AND FREEDOM FROM COMPUTER VIRUS. THE COMPANY WILL NOT BE LIABLE FOR ANY DAMAGES OR LOSSES, INCLUDING DIRECT, INDIRECT, CONSEQUENTIAL, SPECIAL, INCIDENTAL OR PUNITIVE DAMAGES AND/OR LOST PROFITS, IN CONNECTION WITH USE OF THE INTERNET, THIS WEB SITE, ITS CONTENT OR ITS LINKS
    Further, the Company will not be liable to you for any failure or delay by the Company to provide access to the Data or any of its obligations under these terms and conditions where such failure or delay is the direct or indirect result of any circumstances beyond the Company's reasonable control (and the Company's obligations will be suspended for the duration of such circumstances).

    CAD Download (Unit Assembly)

    CAD Download: File Format
    生成

    Thank you for downloading the data.

    Click the Good IDEA! button when you find interesting design tips.


    This data is utilized in order to list more useful application examples in the future.

    CAD Data Limitations

    1. Assembly data shows the assembly drawings in the concept design phase. The sole purpose of the data is to explain the structure and functionality of the assembly and is not considered nor to be used as a final design.
      You will need to edit the Data so that it meets your specific design conditions.
    2. Unit assembly Data consists of some sub-assemblies.
      It is configured so that each sub-assembly unit can be used as it is or edited.
    3. * The part in the frame is a sub-assembly unit.

    4. The Data for fabricated parts is based on easy-to-edit dimensions and shapes in sketches and histories.
    5. The Data including the third-part components are made by the Company.

    Page top

  • * Unit assembly Data consists of some sub-assemblies.
       It is configured so that each sub-assembly unit can be used as it is or edited.

Application Overview

Purpose

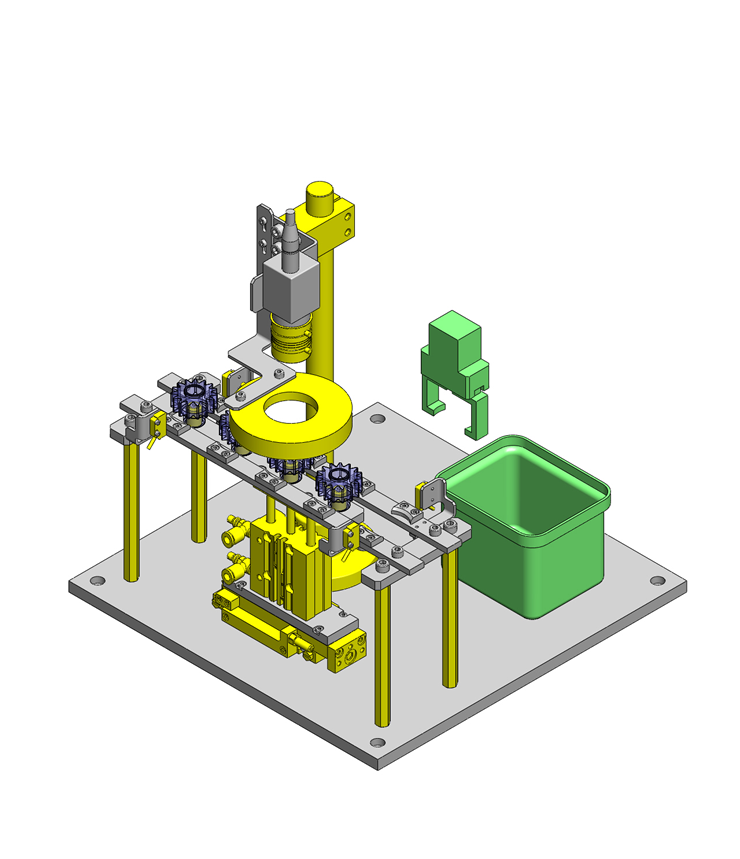
  • Perform visual inspection on mechanical components such as small gears.

Target workpiece

  • Plastic gears
    • Workpiece size: φ34, Height 29 mm

Design Specifications

Operating Conditions or Design Requirements

  • External dims: 320 x 320 x 341 mm
  • Overall height: 341 mm
  • Up/down stroke: 30 mm
  • Feed stroke: 50 mm

Operating Conditions or Design Requirements

  • Component feed position accuracy: ±0.5

Selection Criteria for Main Components

  • This design has a more compact design footprint than the conventional guided cylinder design by 50%.

Design Evaluation

Verification of main components

  • Select cylinder tube DIA. from load conditions, and select a camera・lens from inspection resolution requirements.
  • Selection of air cylinder tube I.D.
    • App. condition: Horizontal mount
    • Conditional value: Load mass M = 0.5 kg
      Friction coefficient μ = 0.2
      Gravitational acceleration g = 9.8 m/s², then
    • Actual load F = μMg = 0.2 × 0.5 × 9.8 = 0.98N
    • Operating pressure P =0.4 MPa
    • Load ratio η=50%, then
      Required cylinder force F0 = (F / η) × 100 = (0.98 / 50) × 100 = 1.96N
    • Cylinder tube I.D. DO = √(1.274 × FO / P) = √(1.274 × 1.96 / 0.4) = 2.50mm
      → 12mm cylinder I.D. is OK
  • Selection of cylinder with guides I.D.
    • App. condition: Vertical mount
    • Conditional value: Load mass M = 0.21 kg
      Gravitational acceleration g = 9.8 m/s², then
      Actual load F = Mg = 0.21 × 9.8 = 2.06N
      Operating pressure P =0.4 MPa
      Load ratio η=50%, then
    • Required cylinder force F0 = (F / η) × 100 = (2.06 / 50) × 100 = 4.12N
    • Cylinder tube I.D. DO = √(1.274 × FO /P) = √(1.274 × 4.12 / 0.4) = 3.62mm
      → 12mm cylinder I.D. is OK
  • Selection of camera, lens
    • Condition: Inspected subject: Gear Dims 34mm
      : Defects of 0.1mm or larger
    • Selected camera: 1/1.8 inch, 1,920,000 pixels (1600 x 1200)
      From catalog (1/1.8 ≒ 1/2)
      Field of view 42 x 56 (workpiece shape is satisfied)
      WD90mm lens and extension ring are selected.
      ⇒ One pixel = 0.035mm (56mm = 1600 pixels)
      ・0.1mm can be inspected.

Other Design Consideration

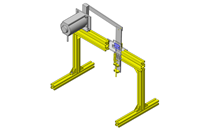
  • Cylinder with guides and air slide table are used for moving the components under the guide.
  • If the component is unstable at the lifting position add a component position recognition sensor, to allow for safer transport.

Explore Similar Application Examples

Page - / -

Part List

No. Part Name Sample Picture MISUMI Part Number
(click the Part Number below for details)
Quantity
1 Hex Posts LSBWRK10-130 4
2 Photoelectric Sensor(Currently not available) MT-STL 2
3 Air Slide Guide MPPU12-60-SMN 1
4 Air Cylinders With Twin Guides MGCLB12-30 1
5 Locating Pins LPZR3-P11-B16-G9 5
6 Brackets for Device Stands CSTF20 1
7 Strut Clamp KQM20 1
8 LED Lamps LPDRR90-80 1
9 Post For Stand STA20-330 1
10 CCTV Lenses MLCV12 1
11 CCTV Lens Adjuster LCVR0.5 1
12 Sensors for Air Cylinders MD13L1 2
13 Flow Rate Control Valves SPSNL6-M5 2
  • The part list above only contains MISUMI parts.
    Part list download (CSV) includes MISUMI and third party components used in this example.
  • TERMS AND CONDITIONS FOR USE OF CAD DATA
    Your access to the CAD data that MISUMI Corporation (hereinafter referred to as the Company) posts on this site (including 3D CAD data, intermediate 3D CAD data and 2D CAD data; hereinafter referred to as the Data) are of products manufactured and/or sold by the Company (hereinafter referred to as the Products) assumes that you have read and accepted these terms and conditions which govern your use of the Data. If you do not agree to these terms and conditions, you must stop using this website and the Data. You must not use the Data for any unlawful purpose or in any manner inconsistent with these terms and conditions.
    1. CAD Data
    The Data is prepared for assisting the Company's users in the CAD design process by providing dimensions and other Product information. In order to provide the best speed and stability working within this site, the Product drawings were simplified to reduce the size of the Data. For instance, some of the Products are shown without the oil groove shape, screws or spring shape. Also, please be aware that the tolerance, surface roughness and/or chamfer of the Data may vary from the actual Products.
    2. Disclaimer on Data
    While the Company has carefully prepared the Data, accuracy of the Data is not guaranteed and is subject to the variances as described above. The Company may also modify, add or delete the Data at any time without prior notice. The Company assumes no liability for any direct, indirect, consequential or special damages that you may claim resulted from your use of the Data or any changes to or deletions of the Data regardless of the reason. The Company provides no warranty as to the quality, accuracy, functionality, safety or reliability of the combination of Products and parts. Example applications and combinations of the Products are provided for illustrative purposes only.
    3. Copyright
    Copyrights to the content and the Data belong to the Company or the manufacturers of the Products. The said copyright is protected by the Copyright Act and international treaties. The use (including duplication, modification, uploading, posting, transmission, distribution, licensing, sales and publishing) of the Data except for the purpose to use the Data described above without prior approval of the Company is not allowed. The Data cannot be used for any purposes (including sales promotion) except for designing your machine. If you violate this provision or the laws or regulations, the Company may prohibit you from the use of the Data, the Company’s site and/or take legal action. So long as you comply with these terms and conditions, the Company grants to you a non-exclusive, non-transferable, revocable license to access and use the Data for the sole purpose of assisting you in designing machines that incorporate products.
    In case that the CAD data is found to have been to be used for any purpose other than mentioned above or against the related laws, MISUMI may take legal actions, including the one for blocking the involved user from using CAD data and from accessing to the MISUMI site.
    4. Disclaimer of Warranty
    ANY AND ALL CONTENT APPEARING ON THIS WEB SITE IS PROVIDED FOR INFORMATIONAL PURPOSES ONLY. THIS WEB SITE, ITS CONTENT AND ITS LINKS ARE PROVIDED ON AN "AS IS" AND "AS AVAILABLE" BASIS AND ARE USED ONLY AT YOUR SOLE RISK, TO THE FULLEST EXTENT PERMISSIBLE BY LAW. THE COMPANY DISCLAIMS ALL WARRANTIES, EXPRESS OR IMPLIED, OF ANY KIND, REGARDING THIS WEB SITE (INCLUDING ITS CONTENT, HARDWARE, SOFTWARE AND LINKS), INCLUDING AS TO FITNESS FOR A PARTICULAR PURPOSE, MERCHANTABILITY, TITLE, NON INFRINGEMENT, RESULTS, ACCURACY, COMPLETENESS, ACCESSIBILITY, COMPATIBILITY, SECURITY AND FREEDOM FROM COMPUTER VIRUS. THE COMPANY WILL NOT BE LIABLE FOR ANY DAMAGES OR LOSSES, INCLUDING DIRECT, INDIRECT, CONSEQUENTIAL, SPECIAL, INCIDENTAL OR PUNITIVE DAMAGES AND/OR LOST PROFITS, IN CONNECTION WITH USE OF THE INTERNET, THIS WEB SITE, ITS CONTENT OR ITS LINKS
    Further, the Company will not be liable to you for any failure or delay by the Company to provide access to the Data or any of its obligations under these terms and conditions where such failure or delay is the direct or indirect result of any circumstances beyond the Company's reasonable control (and the Company's obligations will be suspended for the duration of such circumstances).

    CAD Download (Unit Assembly)

    CAD Download: File Format
    生成

    Thank you for downloading the data.

    Click the Good IDEA! button when you find interesting design tips.


    This data is utilized in order to list more useful application examples in the future.

    CAD Data Limitations

    1. Assembly data shows the assembly drawings in the concept design phase. The sole purpose of the data is to explain the structure and functionality of the assembly and is not considered nor to be used as a final design.
      You will need to edit the Data so that it meets your specific design conditions.
    2. Unit assembly Data consists of some sub-assemblies.
      It is configured so that each sub-assembly unit can be used as it is or edited.
    3. * The part in the frame is a sub-assembly unit.

    4. The Data for fabricated parts is based on easy-to-edit dimensions and shapes in sketches and histories.
    5. The Data including the third-part components are made by the Company.

    Page top

Page top