Outside Micrometer (With Calibration Results / Calibration Certificate / Traceability System Image)

Brand :
NIIGATA SEIKI (SK)
Caution
Product Description
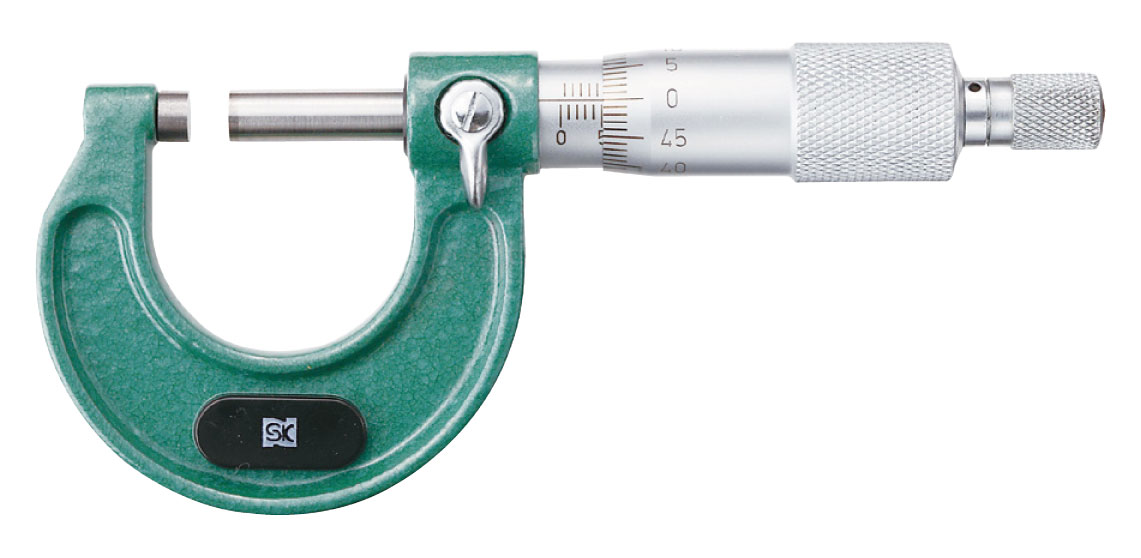
Standard type micrometer.
[Features]
· Measurement surface has a carbide tip.
· With low-pressure device.
· The frame has a painted finish.
· Includes 1 of each reference rod (excluding MC105-25)
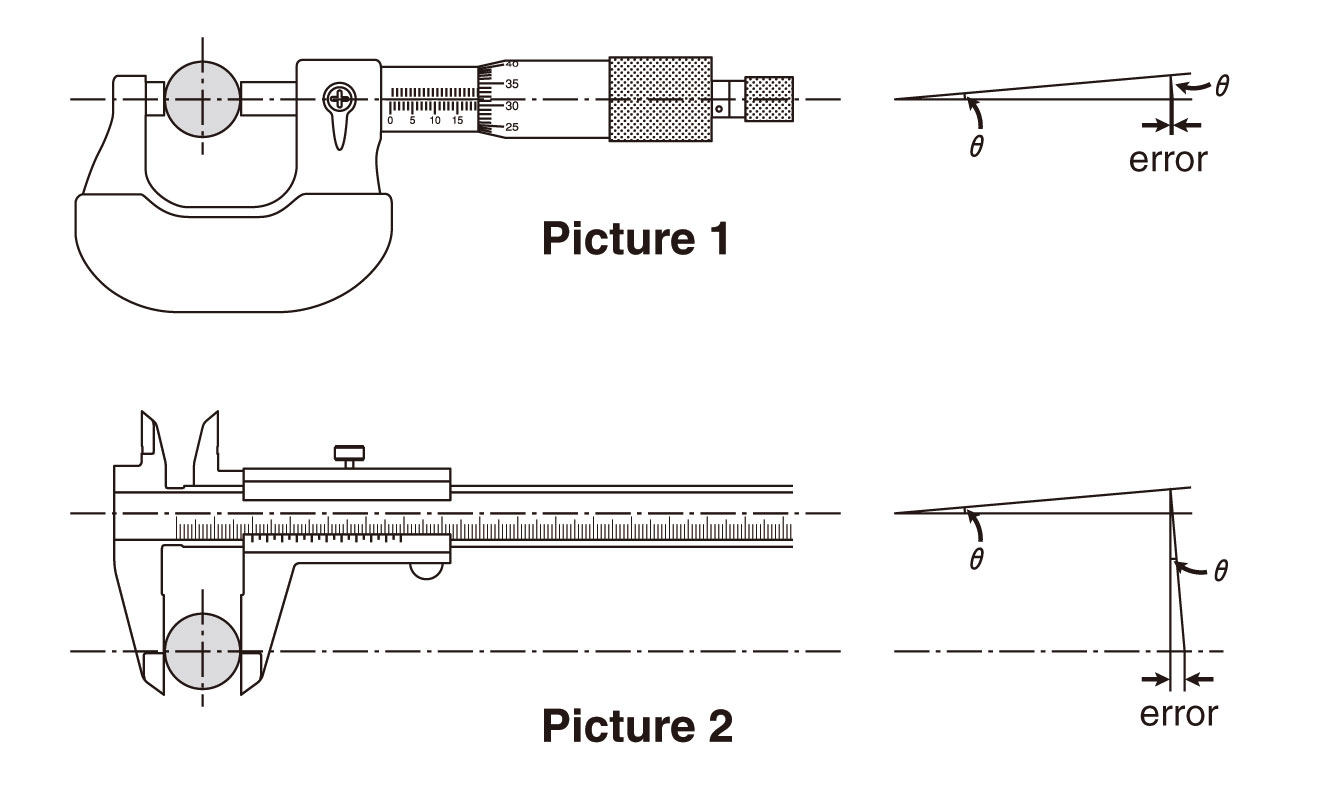
What is Abbe's principle
In picture 1, graduation and measured object is align on the same line,
compare to picture 2, the alignment is o , picture 1 creates less error
for sliding division's slope and this is Abbe's principle.
compare to picture 2, the alignment is o , picture 1 creates less error
for sliding division's slope and this is Abbe's principle.

The structure of vernier caliper is opposite of Abbe's principle, so slider would
receive measuring pressure, gap (clearance) will be created.
If there's avgap, it will create force that's opposite to the measuring
direction,the jaw will not be parallel and error will be greated when it's
moving towards the measuring object.
Most of the micro meter's structure is made according to Abbe's principle,
it will not have measuring error like vernier caliper.
*Usually, vernier caliper's measuring pressure is 0.98~1.47N/㎡ (around 100g~150g)
What is Micro meter
The same with caliper, micro meter is one kind of
popular measuring tool.
popular measuring tool.

Outside measurement micro meter is the most popular.
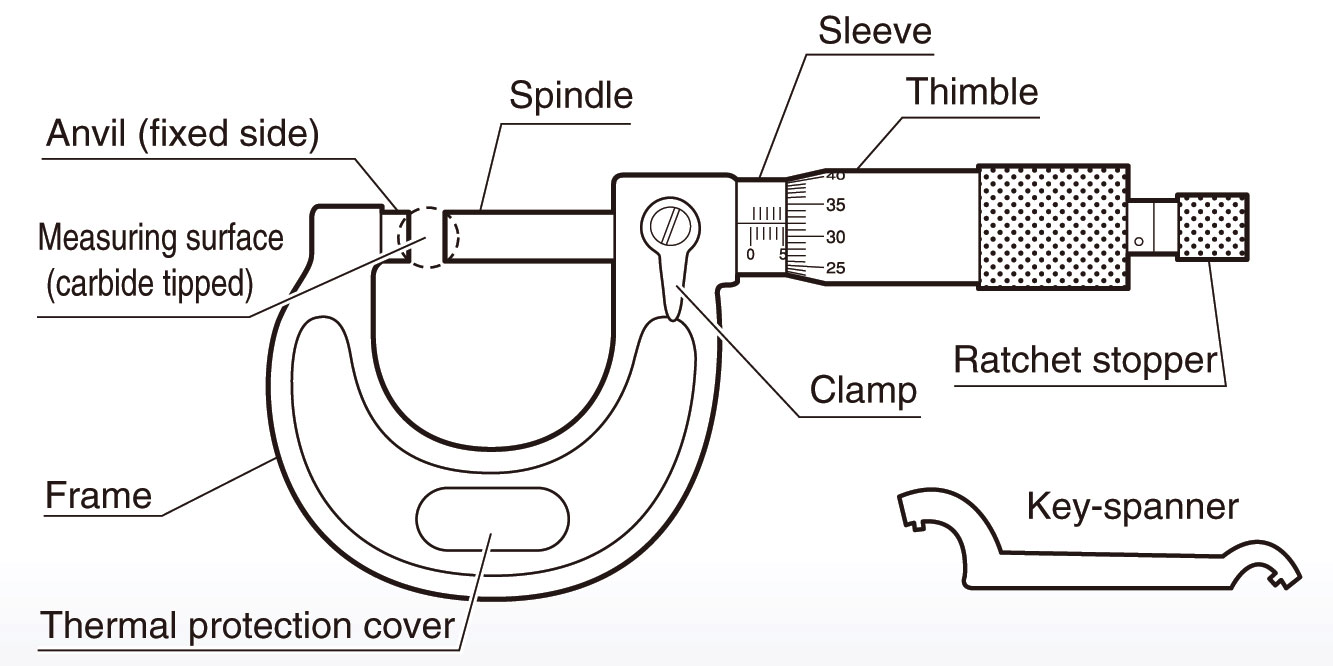
In the picture below, the frame of micro meter's head contains two ends,
which includes anvil and spindle.
Usually, every turn of the thimble is 0.5mm, and the thimble has graduation of 50
equal division, which provides measurement up to 0.01mm. At the end of
the thimble is ratchet stopper (pressure testing device), provides constant
pressure.
• Parts of micro meter

Types of Micro meter
 |  |
| • Standard micro meter For outside measurement. | • U shape steel plate micro meter For measuring steel plate thickness. |
 |  |
| • Spline micro meter To conveniently measure groove of spline shaft. | • Disk micro meter Disk shape gauge head is perfect for measuring root tangent length of gears. |
 |  |
| • Blade micro meter Measuring surface is blade type, perfect for measuring groove diameter of shaft,etc. | • Spherical face micro meter Anvil side of gauge head is spherical shape, perfect for measuring wall thickness of pipe. |
 | • Point micro meter Perfect for measuring the thickness of frill's web, etc. |
Methods of reading Micro meter
methods of reading graduation
| • Examples of reading graduation | |
 | *Usaually, the left picture's reading value up to 0.01mm, lower picture's reading value measure with eyes up to 0.001 (1μm). |
 | |
| Reading value for sleeve is 7.0mm, reading value for thimble is 0.37mm and measured value is 7.37mm. | |
Both upper and lower part of sleeve has graduation.
- Lower part has graduation 1mm unit, upper part has graduation between
1mm unit showing the 0.5mm unit graduation. - Reading graduation is easy. However, graduation line at sleeve can be hard
to read, especially the upper 0.5mm line. Please read carefully.
digital micro meter is getting more popular.
Methods of using Micro meter
Turn thimble counter clockwise to hold onto measured object withanvil ( xed side) and spindle. Then, idling turn the ratchet stopper
1~3 times for measuring.
*Using ratchet stopper can increase measuring pressure.

*Measuring example for digital micro meter
• Parts of micro meter

Adjustment of Micro meter
methods to set 0 position (in the situation 0~25) | 01 Cleaning measuring surface To keep the measuring surface of anvil and spindle clean, gently clip a clean paper between the two measuring surfaces, then let loose of the spindle to remove the paper. *Dust is easily attracted to certain types of paper, do not force the paper out. | |
 | 02 Turning ratchet To adjust measuring pressure is very important. Idling turn the ratchet stopper 1~3 times. | |
 | 03 Correcting clamp In the picture, graduation of 0 has about 5μm deviation and it needs to be corrected. Clamp is used to set spindle into correct location. | |
 | ||
 | 04 Put in key-spanner The sleeve on the back of the clamp has a hole. Put key-spanner into the hole and adjust to 0. If spanner is not correctly put in, it will loosen the spanner and break graduation, please be careful. | |
 | 05 0 position This is on the accurate 0 positions. When reading graduation, eyes should look directly at graduation. 2~3μm error will occur if it's not read directly. | |
 | 06 Confirm accuracy (Use micro meter stand) *Due to turn by screw , error will occur on screw's pitch, needs to make sure it's on 0 position. Hold micro meter with micro meter stand. | |
 | 07 Confirm accuracy (Clip block gauge on) To click block gauge on, make sure dimension and block gauge and graduation on micro meter is the same. | |
 | ||