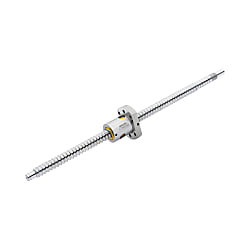
Rolled Ball Screws Shaft Dia.12 Lead 4/5/10 Accuracy Grade C7
Caution
- Download Free! >>Economy Series Catalog ver2023 (TH-EN)_Part01 CLICK here
Product Description
- Rolled Ball Screws Shaft Dia.12 Lead 4/5/10 Accuracy Grade C7 from MISUMI.
- The Rolled Ball Screws have a shaft diameter of 12 mm and are available in three different lead sizes:4mm, 5mm, or 10mm.
- The accuracy grade option for this product is C7.
- The overall length of the shaft screw can be customized to fit a range of configurations, from 150mm to 800mm, in 1mm increments.
- The lead twisting direction for this product is right-handed.
- The screw shaft is made of S55C while the nut is made of SCM420.
Economy Rolled Ball Screws Shaft Dia. 12
- Available in various lead sizes for varied applications.
- Precision C7 grade ensuring consistent accuracy.
- Shaft lengths configurable within a specified range in 1mm increments
- Right-hand twist for seamless integration in your system.
- Constructed from robust S55C and SCM420 for long-term reliability.


![]()
MISUMI Standard
![]()
Cheaper Price
![]()
Product Variety
![]()
3D CAD Support
Product Overview
1. The product is an Economy series C7 rolled Ball Screw without pre-pressure suitable for a feeding mechanism requiring multi-point positioning.2. Ball Screw Standard nuts are adopted to meet the requirement of space saving.
3. The shaft end of screw is processed in accordance with standard specifications, so it can be used directly with the support unit without reprocessing. If the shaft end requires alteration, which should be specified according to the catalog.
4. When used in combination with MISUMI’s Economy series support unit, it has a better effect.
| Model No./Specification Example | |||||
| Model No. | Accuracy | Shaft Dia. | Lead | Total Length | |
| MISUMI Conventional Standard Product | BSSZ1210-600 | C7 | 12 | 10 | 600 |
| MISUMI Conventional C-Value Product | C-BSSTH1210-600 | ||||
| Economy Series* | C-TBSB1210-600 | ||||

| Accuracy Class | C7 | C10 |
| Cumulative Lead Error (4) | 52 | 210 |
*Lead accuracy is reference for accuracy class C7.
Mounting part accuracy differs from MISUMI conventional products
See ■ Mounting Part Accuracy below

Rolled Ball Screw
| Model | Lead | Screw Length | (1) (2) Runout Tolerance (Max.) | (3) Runout Tolerance (Max.) | (4) (5) Perpendicularity Tolerance (Max.) | Axial Clearance | ||||||
| Type | Screw Shaft Outer Dia. | Min. | Max. | Conventional Product (BSST) | Economy Series | Conventional Product (BSST) | Economy Series | Conventional Product (BSST) | Economy Series | Conventional Product (BSST) | Economy Series | |
| C-TBSE | 8 | 2 | 100 | 400 | 0.014 | 0.027 | 0.014 | 0.027 | 0.007 | 0.009 | 0.03 or less | 0.05 or less |
| 10 | 2/4 | 150 | 600 | |||||||||
| C-TBSE C-TBSB | 12 | 4/5/10 | 150 | 800 | 0.1 or less | |||||||
| 15 | 5/10/16/20 | 150 | 1200 | |||||||||
| 20 | 5/10/20 | 200 | 2000 | 0.05 or less* | 0.15 or less | |||||||
| 25 | 5/10/25 | 200 | 2000 | 0.02 | 0.04 | 0.02 | 0.04 | 0.07 or less* | 0.2 or less | |||
| 32 | 5/10/32 | 300 | 2000 | 0.008 | ー | |||||||
(3)
(4)・(5)
This measurement item is affected by Total Run-out (8) of the Screw Shaft, and so it must be corrected.
Radial run-out of drive component interface surface in relation to screw shaft support axis.
Perpendicularity of shaft's bearing shoulders in relation to screw shaft support axis.
Dimensional Drawing
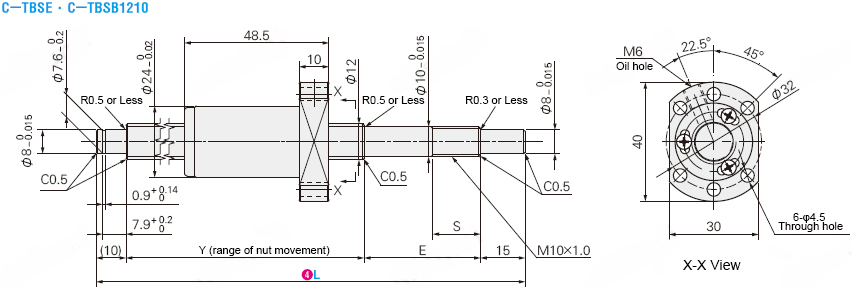
Product Drawings of Ball Screw (Unit: mm)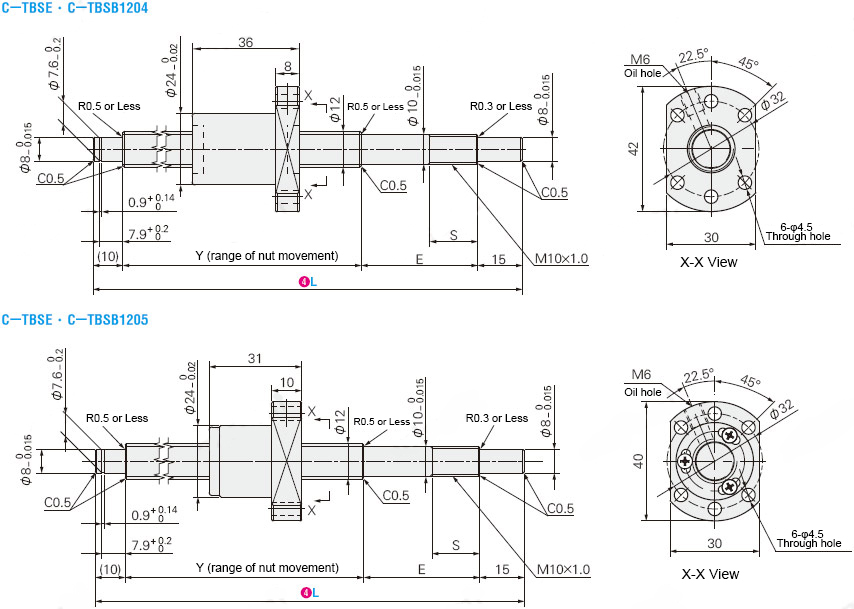
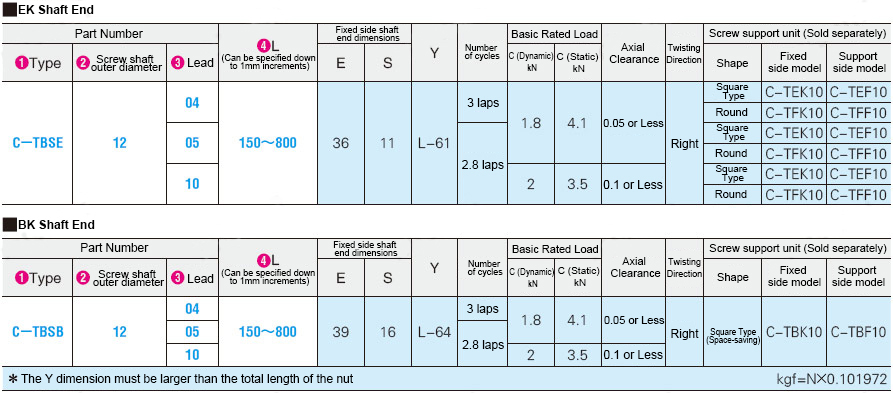
Specification Table

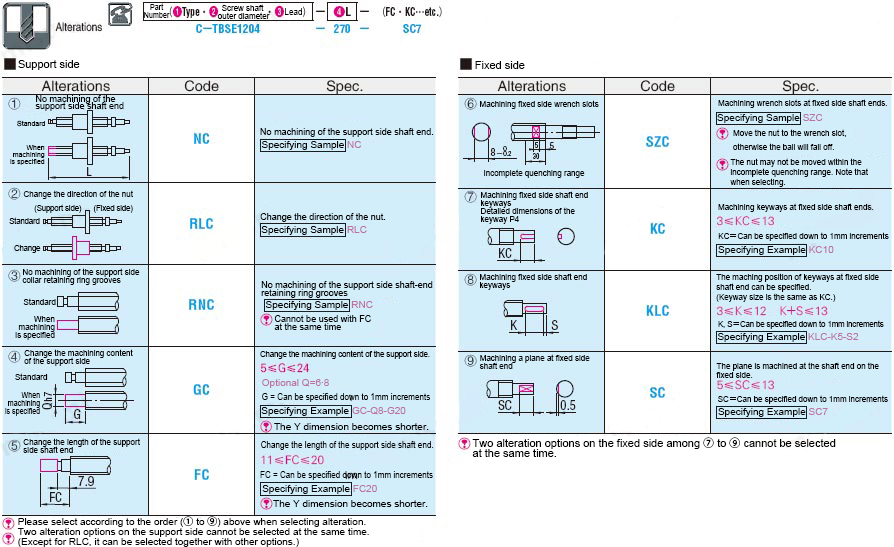
Alterations
■ Keyway Dimension

| Shaft Dia. | b | t | ||
| Reference Dimension | Tolerance (N9) | Refrence Dimension | Tolerance | |
| 6 to 7 | 2 | -0.004 -0.029 | 1.2 | +0.1 0 |
| 8 to 10 | 3 | 1.8 | ||
| 11 to 12 | 4 | 0 -0.03 | 2.5 | |
| 13 to 17 | 5 | 3 | ||
| 18 to 20 | 6 | 3.5 | ||

| Type | Screw Shaft O.D. | Runout tolerance G (Max.) | Incomplete Hardened Area (ℓ) | ||||||||||
| ~125 | 126~200 | 201~315 | 316~400 | 401~500 | 501~630 | 631~800 | 801~1000 | 1001~1250 | 1251~1600 | 1601~2000 | |||
| E-TBS | 4 | 0.060 | 0.075 | - | - | - | - | - | - | - | - | - | 5 |
| 6 | 0.075 | 0.075 | - | - | - | - | - | - | - | - | - | ||
| C-TBSE C-TBSB | 8 | 0.080 | 0.108 | 0.155 | 0.185 | - | - | - | - | - | - | - | 10 |
| 10 | - | 0.093 | 0.120 | 0.155 | 0.195 | 0.250 | - | - | - | - | - | ||
| 12 | - | 0.093 | 0.120 | 0.155 | 0.195 | 0.250 | - | - | - | - | - | ||
| 15 | - | 0.085 | 0.100 | 0.120 | 0.148 | 0.180 | 0.230 | 0.295 | 0.380 | 0.500 | 0.525 | ||
| 20 | - | 0.085 | 0.100 | 0.120 | 0.148 | 0.180 | 0.230 | 0.295 | 0.380 | 0.500 | 0.525 | 15 | |
| 25 | - | 0.085 | 0.085 | 0.100 | 0.120 | 0.140 | 0.165 | 0.215 | 0.265 | 0.345 | 0.445 | ||
| 32 | - | - | 0.085 | 0.100 | 0.120 | 0.140 | 0.165 | 0.215 | 0.265 | 0.345 | 0.445 | 20 | |
| E-KBS | 4 | 0.050 | - | - | - | - | - | - | - | - | - | - | 5 |
| 6 | 0.050 | 0.050 | - | - | - | - | - | - | - | - | - | ||
| C-KBS | 8 | 0.060 | 0.075 | 0.100 | - | - | - | - | - | - | - | - | |
| 10 | 0.055 | 0.065 | 0.080 | 0.100 | - | - | - | - | - | - | - | ||
| 12 | - | 0.065 | 0.080 | 0.100 | 0.120 | - | - | - | - | - | - | 10 | |
| 15 | - | 0.060 | 0.070 | 0.080 | 0.095 | 0.110 | 0.140 | 0.170 | 0.210 | - | - | ||
| 20 | - | 0.060 | 0.070 | 0.080 | 0.095 | 0.110 | 0.140 | 0.170 | 0.210 | 0.270 | - | 15 | |
| 25 | - | - | 0.060 | 0.070 | 0.080 | 0.090 | 0.100 | 0.130 | 0.170 | 0.210 | - | ||
| E-KLR | 4 | 0.050 | 0.050 | - | - | - | - | - | - | - | - | - | 5 |
| 8 | 0.065 | 0.075 | 0.100 | - | - | - | - | - | - | - | - | ||
| 10 | 0.065 | 0.065 | 0.080 | 0.100 | - | - | - | - | - | - | - | ||
Ball Screw Runing Noise Level
Ball screw noise level is affected by several important factors:
The figures below show the noise levels of ball screws with different specifications.
Note:
- These test results are for reference only and do not represent all ball screw specifications.
- Actual noise levels may vary depending on multiple factors.
Misumi C7 grade ball screws have controlled outgoing noise levels and guarantee less than 70 dB at a rotational speed of 1500 RPM.
(Noise measured at a distance of 1 meter from the ball screw)

Product Features
1. Even if it is MISUMI economy series, the inspection standard is the same as that of MISUMI standard products, which implements quality inspection before leaving the factory to provide users with products that meet the specifications of the catalog.2. Ball Screw It no longer needs drawing processing, saving drawing time, min. shipped in 6 day at the earliest.
3. With a rich shaft end specifications, it has specified additional processing to meet a variety of occasions.
Example of Use
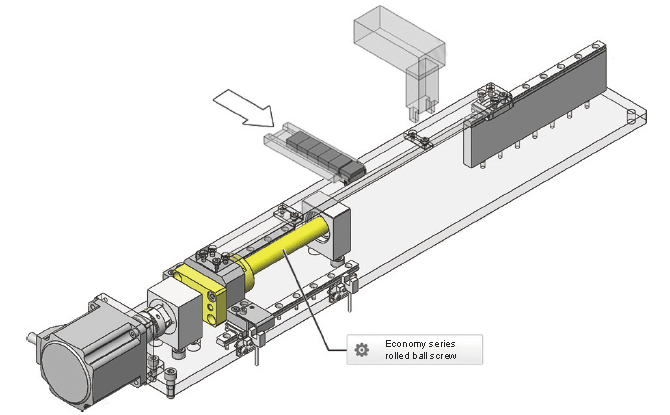
Precautions
● Rotating the nut by hand may not feel smooth, but does not affect the positioning precision, so this product is suitable for multi-point positioning feeding mechanism. Please feel free to use.
● If the operation requires low runout (e.g. machining equipment), please use MISUMI standard products.
In operation, if there is too much noise or sharp and harsh sound, please make sure that the installation accuracy of the Ball Screw and the specifications of peripheral components such as motors and couplings are appropriate.
● Lithium soap grease. SHC32 (red) has been applied.
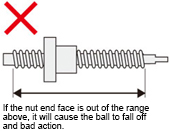
Do not let the nut exceed the movement range of the Ball Screw nut, or screw out of the screw shaft, otherwise the ball will fall off and the ball cycling parts will be damaged.
● Ball Screws and nuts placed with an inclination may fall due to weight. Please be careful.
● This product is a machined type, so there will be knife patterns and color difference in its appearance. Small scratches or color changes without affecting the use and main function are of a normal phenomenon. Please feel free to use.
■ Precautions of the Ball Screw and peripheral parts design and assembly
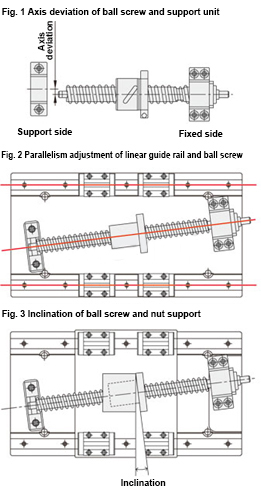
The Ball Screw is a component that only bears axial load. If it is subjected to radial load or moment load, poor sliding, vibration or abnormal noise may occur, shortening its service life.
The reason that the Ball Screw bears radial load and moment load is the axis deviation and parallelism error of the surrounding parts. Therefore, it is necessary to correctly design and assemble the peripheral parts of the Ball Screw to prevent errors.
● Axis deviation of Ball Screw and support unit (Fig. 1)
- Axis deviation is the deviation of the Ball Screw fixed by the fixed side support unit and the bearing of the supporting side support unit.
- The allowable value of the axis deviation is 20μ or less (reference value)
●Parallelism between Ball Screw and linear guide (Figure 2)
- Parallelism error refers to the inclination of the Ball Screw in the up-down or left-right direction with respect to the reference of the linear guide.
- The allowable value of inclination is below 1/2000 (Figure 3)
●Precautions of assembly
If you notice abnormal noises during the operation of the Ball Screw or jamming during movement after assembly, please loosen the connections of the parts before proceeding. Adjust and reassemble after moving smoothly.
- Error in the left and right direction of the support unit (Fig. 1)
- Parallel error of linear guide and Ball Screw (Fig. 2)
- Fixing of workbench and nut bracket
- Fixing of Ball Screw nut and nut bracket
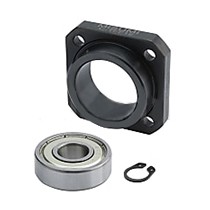
Related Products
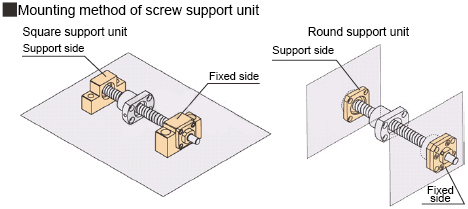
| Ball Screw Type | Economy series support unit Standard square type | Economy series support unit Round type | ||
| Fixed side model | Support side model | Fixed side model | Support side model | |
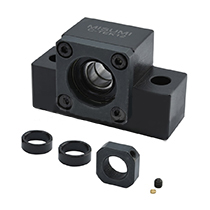
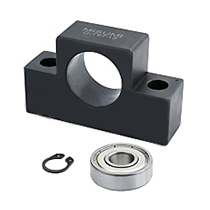
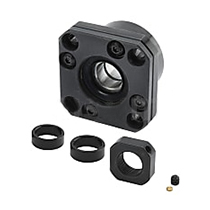
| C-TBSE | C-TEK10 | C-TEF10 | C-TFK10 | C-TFF10 |
 |  |  |  | |
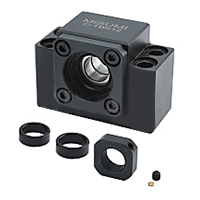
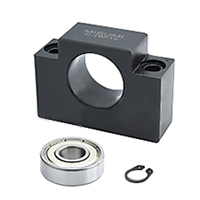
| Ball Screw Type | Economy series support unit Narrow pitch square type | |||
| Fixed side model | Support side model | |||
| C-TBSB | C-TBK10 | C-TBF10 | ||
 |  | |||


